
I am formerly the owner of a small single acre farm in the Smokies. And as the story goes, life changes, and I had to start all over once again. I am now living in the Colorado Rockies, I am rediscovering myself and experiencing all that life has to offer.
After leaving TN I spent a few years living full time in an RV traveling around the Rockies, the Southwest, and the West Coast. Then I settled a bit in Lafayette Colorado where I’ve been working with my daughter as a building & remodeling contractors. Our main focus, at Strong Work Renovations, is luxury bath renovations, basement finishes & small additions.
My focus is on happy living; physically, socially and spiritually, as well as being a conscious and caring steward of planet Earth. Nothing about that has changed, no matter where or how I live.
Fast forward a bit to #COVID19 Pandemic 2020, where the future is uncertain and a certain SHTF scenario has come to fruition. As a result, I’ll be pulling back a little from the big city life in Lafayette, and re-establishing a new homestead in an adorable, albeit dusty, town on the Western Slope.
In May 2020 we’ll begin the new adventure, and naturally, I’ll be here journaling publicly. Why not right? So I’ll update the website this month, April and see if I can iron out all the old kinks.
Check back soon!!!
You will find my OLD Farm blog posts on the right-hand navigation. Because I had to move in a hurry and wasn’t fully prepared I seem to have lost the ability to easily re-add the images to the posts. But I keep it up because I know that the text is far more valuable than a few pictures here.
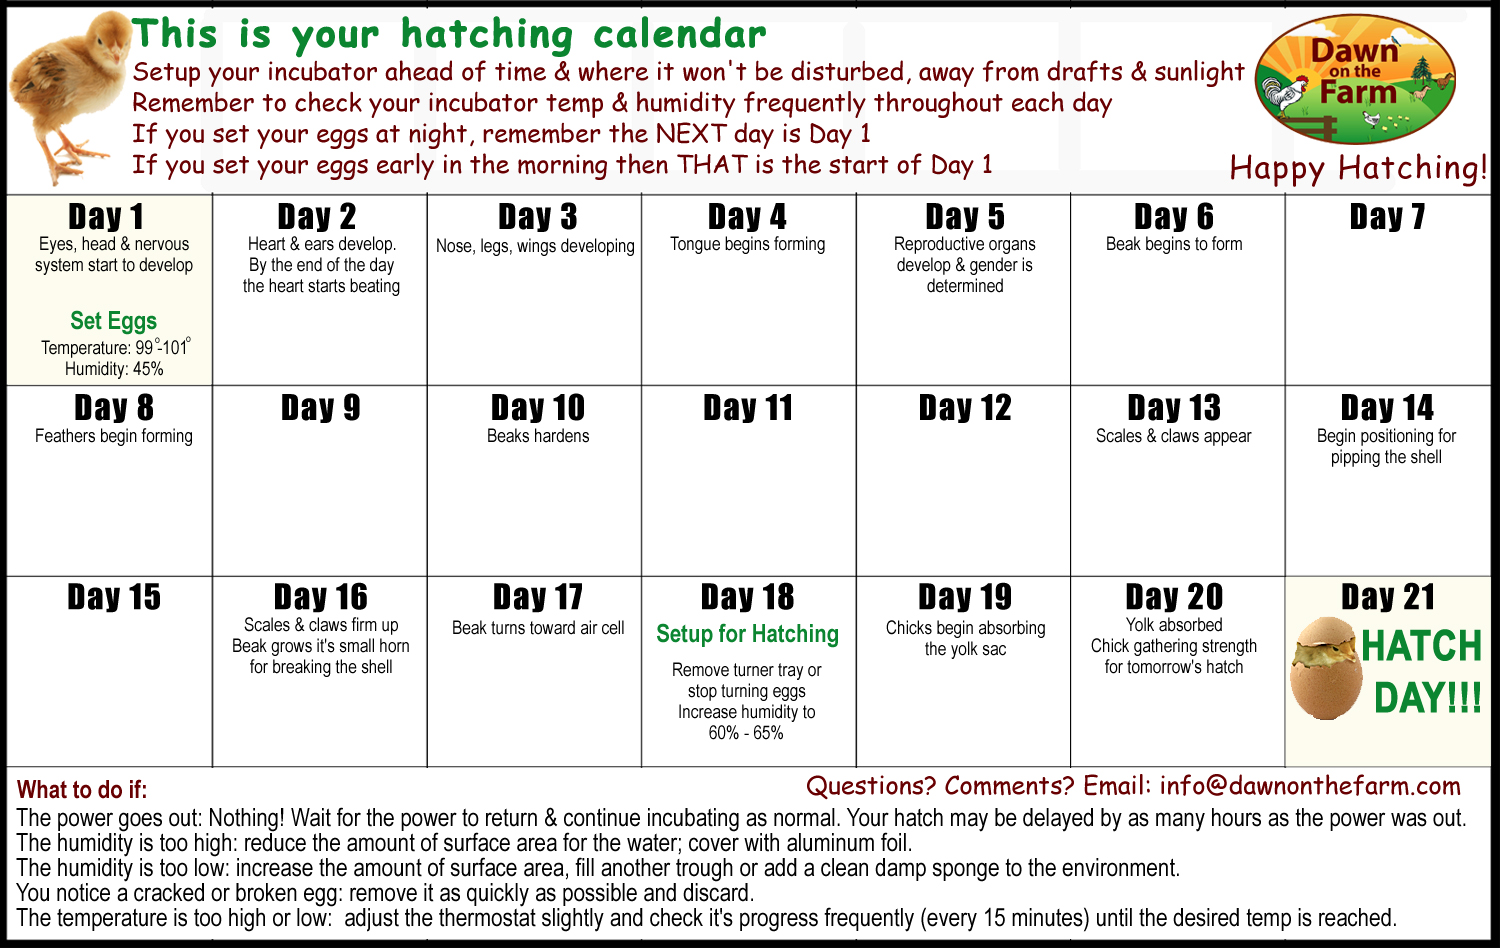
This is my most popular requested item from back in the day. Click for full size printable.